Addressable LED Light Effects
This article explores how to create a system for designing and applying color themes and transition effects to a large strand of WS2812b (NeoPixel) lights.
The scope covered is simply an idea of how to orchestrate NeoPixel-style lights (as opposed to a completed library). As such, you will not find any full source to view. You can however check out my own LED project here as one such reference.
The problem
If you have a bunch of addressable lights, such as a strand of NeoPixels, the challenge invariably becomes how to make it look pretty. There are lots of guides featuring how to make a rainbow effect which spans the entire strand. But let's take it a step further and explore the other dimensions that can add variety to our light show. Dimensions such as:
- Color themes
- Transition timing
- How the colors are distributed across the strand
Can we create a system that will allow us to define unique and exciting effects with unique and executing color schemes in a coordinated fashion?
System Overview
There are two major classes in my theme system:
- Shader - The color theme, expressed as a gradient.
- Effect - A definition of how the color theme is used per-pixel.
In earlier iterations of this design, I had the effect and the shader as one single unit. It became clear that separating the two made much more sense. How the lights flash and change really has nothing to do with what color is underneath. You get much more variety by making them two separate entities.
Ultimately, we want an easy way to express color themes and - separately - an easy way to express how the colors within a theme are transitioned over time. Let's explore each of these classes in more detail.
The Shader Class
The Shader class is meant to represent a gradient of colors. By leveraging the popular builder pattern we can easily create very complex and evocative color systems. Here's some pseudo-code to demonstrate one such shader.
let RetroFuturistic = color(255, 70, 173)
    .transition_to(255, 0, 0)
    .transition_to(115, 6, 121)
    .transition_to(4, 110, 106)
    .transition_to(255, 255, 0)
    .transition_to(255, 70, 173);
The resulting gradient, which I call Retro Futuristic, is extremely rad in practice and looks like this:
Using just this concept of gradients, we can express many different themes. For example, in a recent project of mine some of the themes that I created using this method include:
- Doctor Who
- R2D2
- Lunar New Year
- Halloween
- Pokemon
- Valentines Day
- Pirate
Gradients are a very powerful mechanism and if you choose the right colors they can evoke nostalgia and emotion. (To see the full list of my personal shaders, check out this file)
Using the Shader Class
Once we've defined a mechanism for creating these gradients, the only real method we need to support is the ability to extract a color from the gradient based on time. Mathematically, this will be implemented using Linear Interpolation.
pub trait Shader {
    pub fn get_color(&mut self, time: u64) -> Color;
}
By defining get_color at the shader class level, we can extract any discreet color from any of our gradients at any particular point in time. Linear interpolation works by taking a start, end, elapsed, and duration variable and returns a discreet point between start and end. What does it mean to interpolate color?
Let's explore a full implementation to understand how to interact with a multi-segmented gradient. Some aspects are not shown - such as the internal workings of the linked-list structure. But the r, g, b math is the important part.
pub fn get_color(&mut self, time: u64) -> Color {
    // Take the current time we are interested in (typically
    // system uptime in milliseconds) and modulus it by
    // the total time of our gradient so we end up with
    // a point between 0 and the total_time.
    let normalized_time = time % self.total_time;
    // The internal representation for this builder pattern
    // is a linked-list, so do some sanity checks.
    if self.root.is_none() {
        return self.color;
    } else {
        // Now we want to find which portion of the gradient we
        // care about. Pre-seed the color we are going to return
        // based on the root color
        let mut color = self.color;
        let mut ptr = self.root.unwrap();
        let mut elapsed = 0;
        // Iterate over each node in the linked-list until
        // we find the target node that our color will fall between.
        while elapsed + unsafe { (*ptr).time } < normalized_time {
            color = unsafe { (*ptr).color };
            elapsed += unsafe { (*ptr).time };
            ptr = unsafe { (*ptr).next.unwrap() };
        }
        let next_color = unsafe { (*ptr).color };
        let duration = unsafe { (*ptr).time };
        // Now is the math part. Use interpolation for
        // r -> r, g -> g, b -> b in order to compute
        // a new color that represents the transition
        // between our current color and the
        // color we want to be transitioning to.

        let r = interpolate(
           color.r as u32,
           next_color.r as u32,
           normalized_time - elapsed, duration);
        let g = interpolate(
           color.g as u32,
           next_color.g as u32,
           normalized_time - elapsed, duration);
        let b = interpolate(
           color.b as u32,
           next_color.b as u32,
           normalized_time - elapsed, duration);
        // Finally, return the rgb of the new computed color.
        return rgb(r as u8, g as u8, b as u8);
    }
}
Now that we have a mechanism for returning a color, it's time to think about how we will use this color.
The Effect Class
Let us consider some simple transition effects. The most basic of implementations would be to have all addressable lights render the same color. The specific color chosen will be from the gradient described in the shader. Over time, we will move across the gradient and update our color accordingly.
Let's add some variation. What if we made each LED start with a delay based on its position?
How about we randomize that delay?
This variable we've isolated is the definition of an effect. We are dilating time itself, modifying the offset of a particular node, and controlling the tempo of how that node moves across the gradient. There's really only 1 variable that you absolutely need to track for this: starting offset. What do I mean by offset? Think of it as what spot in the gradient at which the cycle will begin progressing from.
Initialization Sequence
Each LED will maintain state about itself in the form of a context object which consists of some read-only and some read-write fields. If you have a strand of 50 LEDs, you would have 50 context objects. One for each node. Here's an example of the attributes I decided to track for each LED.
pub struct Context {
    // :Read-only:
    // Out of the total LEDs in the strand, what # am I?
    pub node_id: u64,

    // :Read-only:
    // How many LEDs are in the strand?
    pub total_nodes: u64,

    // :Read-write:
    // What should my starting time offset be
    // when evaluating interpolation?
    pub offset: u64,
}
Special considerations: for embedded systems, this isn't very efficient. But there are many ways to save space and compress this down. Consider using a single array of u64 for example to define the offsets and then using variables in a loop for the node_id and total_nodes.
There are many additional properties you may want to consider adding. Here are a few ideas that I had for ways to add more variance to the algorithms we come up with later:
- Registers - You could keep track of individual variables for each node to use in the effect later on.
- Environmental - Maybe you want to leverage the ambiant temperature, audio volume, and so on.
- Direction - Maybe this node should be going backwards through the gradient instead
- Max_Time - Perhaps this node should only travel some % through the gradient
Once we have a container of information for each node, it's time to write a few initialization sequences. The general contract that I find useful when defining a new effect is this:
pub trait Effect {
    fn initialize (ctx: Context) -> Context;
}
Each effect will define an initialization method which takes a context and returns a new context with all the read-write fields populated. In my case, there is only 1 read-write field: offset, but if you get fancy there may be many more. Here are a few real-world examples of some effects I've written:
pub fn distributed(ctx: Context) -> Context {
    let mut next_ctx = ctx.clone();
    let step = TIME / ctx.total_nodes;
    next_ctx.offset = (ctx.node_id * step) as u64;
    return next_ctx;
}

pub fn randomized(ctx: Context) -> Context {
    let mut next_ctx = ctx.clone();
    next_ctx.offset = rand() % TIME;
    return next_ctx;
}

pub fn grouped(ctx: Context) -> Context {
    let mut next_ctx = ctx.clone();
    next_ctx.offset = (rand() % 3) as u64 * TIME / 6;
    return next_ctx;
}
We can take this a step further and leverage the builder pattern again. Having all effects be the same struct, at least in rust, would make this much easier to create arrays of effects that are iterable.
Effect::new(b"Wave")
    .with_initializer(|ctx| {
        let mut next_ctx = ctx.clone();
        let id = ctx.node_id + 1;
        let step = TIME as f32 / ctx.total_nodes as f32;
        let max = (step * id as f32) as u64;

        next_ctx.offset = rand() % max;
        return next_ctx;
    })
    .build()
Using the Effect Class
If you keep things simple as above, the magic happens once when the LEDs are initialized and then is dormant forever more. Here's some pseudo-code demonstrating how this might be implemented.
const effect = this.active_effect;
const shader = this.active_shader;

// Initialize all the contexts. One for each LED.
for (let i = 0; i < contexts.length; i++) {
    /* Magic happens here to produce the time offsets */
    contexts[i] = effect.initialize(ctx);
}

while (true) {
    const now = millis(); // Get current world-time
    for (const ctx in contexts) {
        // Tell the ws2812b which color this node should be
        set_color(ctx.node_id, shader.get_color(now + ctx.offset));
    }

    // Emit the colors to the ws2812b strip.
    flush_colors();
}
The Math
All these concepts can be implemented exclusively with linear interpolation. There are many guides online that describe how to implement linear interpolation. Wikipedia has some great pseudo-code to help convey the idea. Here's my approach, written in rust.
pub fn interpolate(start: u32, end: u32, elapsed: u64, duration: u64) -> u32 {
    // Calculate step
    let x0 = 0f32;
    let y0 = min(start, end) as f32;
    let x1 = duration as f32;
    let y1 = max(end, start) as f32;
    let x = min(elapsed, duration) as f32;
    let delta = (x  * ((y1 - y0)/(x1 - x0))) as u32;

    if start > end {
        return start - delta;
    } else {
        return start + delta;
    }
}
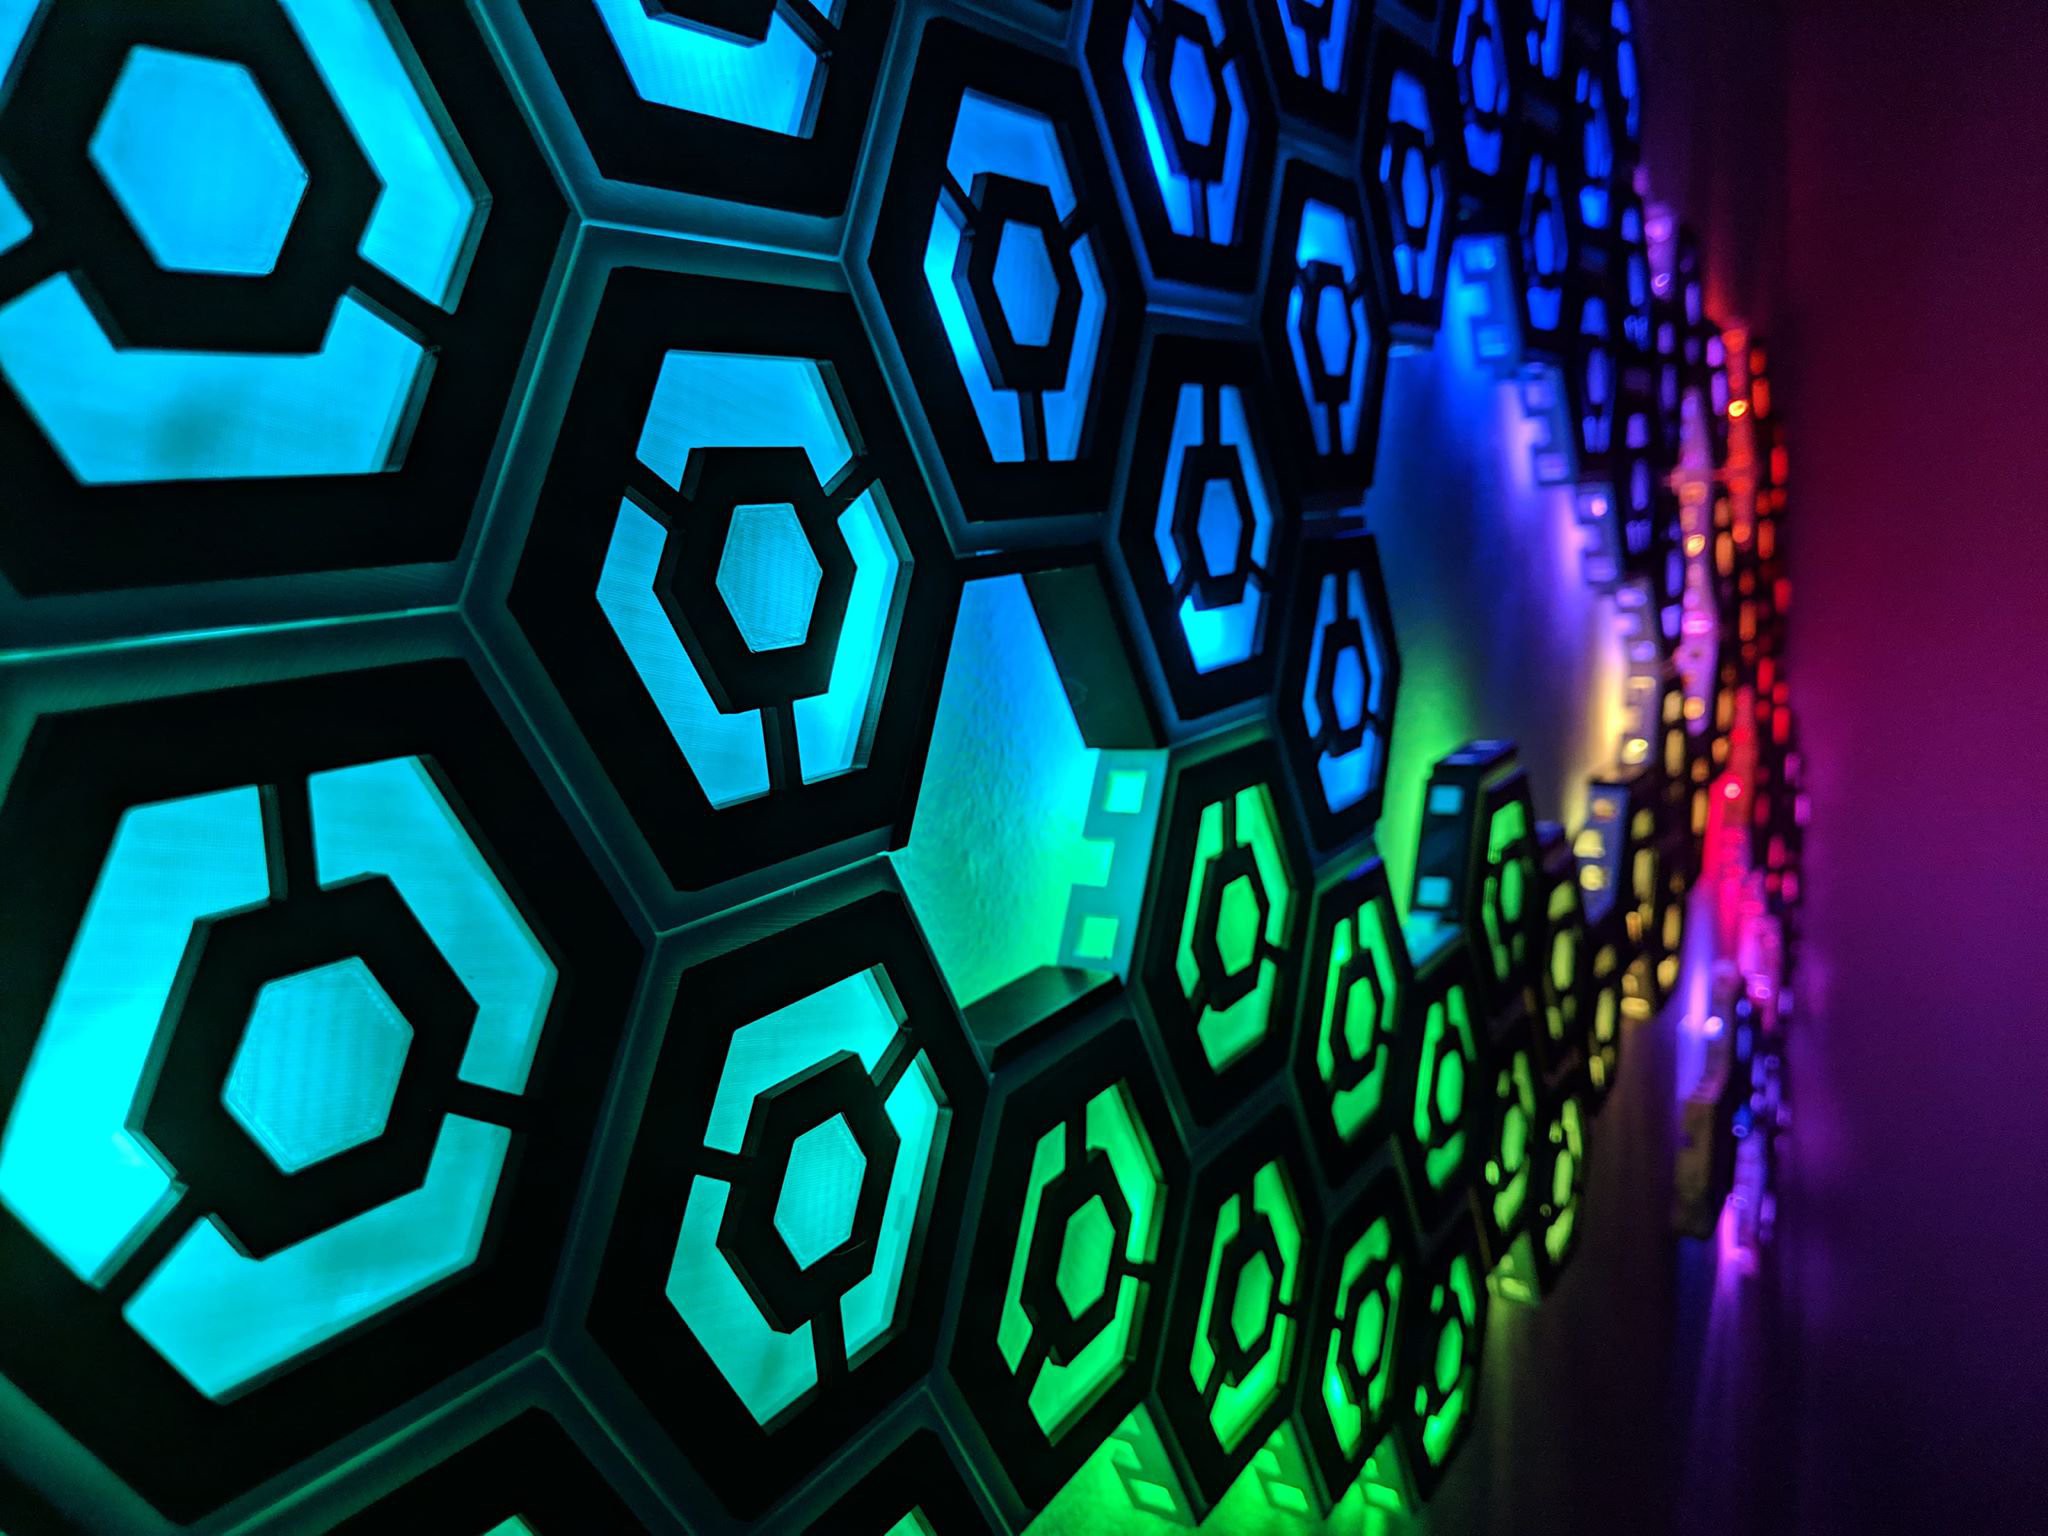
Demonstration
What does this look like in practice? Here is an animation showcasing one segment of my hexagon wall project.
Conclusion
Wrapping up: we've established a few main concepts about how to create a generic system for defining color themes and the effects that drive them. By leveraging this technique, you simply need a few different effects and a handful of shaders in order to create significant variety that is sure to impress onlookers.